When a customer places an order with your store, Breadstack matches them to one of your shipping zones using their shipping address. They'll be able to choose between the shipping methods available for that zone.
- Go to Settings > Ecommerce.
- Under Shipping zones, click + Add Zone.
- Enter a distinct, descriptive name for your zone.
- Under Zone Regions, choose a country. Then, define your zone either by state/province or by postal/zip code:
- To create a zone by state/province - Select the By name option. Select a Country, then use the dropdown to choose a State/province. Click +Add.
If your zone comprises multiple provinces or states, continue selecting them from the list and clicking +Add after each one.
- To create a zone by postal/zip code - Select the By postal code Use Postal Code Instead. Type a postal code and click +Add.
If your zone comprises multiple postal or zip codes, continue selecting them from the list and clicking +Add after each one.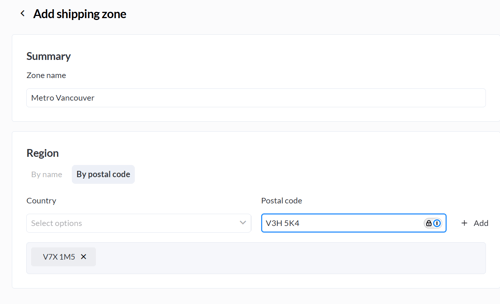
- To create a zone by state/province - Select the By name option. Select a Country, then use the dropdown to choose a State/province. Click +Add.
- When you're done, click Save at the bottom of the screen. You'll now see the ability to +Add shipping method. Click here to continue.
- In the popup, select the methods you'd like to offer customers with delivery addresses in this zone, then click Save on the popup.

- The methods you chose will appear listed. From here, you can;
- Temporarily enable or disable each method using the Status toggle.
- Drag and drop methods by Priority (the order they should appear listed to customers in checkout).
- Click on each method to adjust its settings in this zone. Depending on the method, these settings may include Title, Tax Status, Cost, and Order Minimum.
